-
Beating Extreme Difficulty
Want a challenge? Grab our Demo, turn the difficulty to Extreme, and try to make it to the end of level 3. Here are some things you can expect:
Enemies shoot faster
- Some attacks are still dodgeable, but you’ll need to fit into a just-barely-submarine-sized hole to do it.
- Other (previously dodgeable) attacks become solid walls.
Game intensity is higher
- Our level-building algorithm selects higher-difficulty level sections.
- There are shorter breaks between fights.
Money is tighter
- Enemies still drop the same amount of scrap, but there’s no way you’ll kill them all. They’re just too dangerous.
If you see any of that and think “this sounds like fun!” then this guide is for you.
The Goal
To beat Extreme difficulty, you need to prepare for the challenges outlined above. To have a reasonable chance at beating Level 3, we need to find the following:
Escape Options. Our #1 enemy is solid-wall attacks. When an enemy floods the screen (or part of the screen) with laser fire, we need some way to escape. Our best option is to either destroy enemy bullets with the Close Quarters Cannon or Shockwave or to leap over them using the Teleporter. Finding and affording these (expensive) parts is our top priority.
Damage. To afford the escape options we need, we have to be able to kill and loot enemies. Unfortunately, we won’t be able to afford weapon upgrades (unless we luck out and find the aforementioned Close Quarters Cannon). We’ll need to pick a character that packs a lot of punch from the very start (see Character Selection, below).
Stress Relief. With any extra Scrap, we’ll be buying defensive parts, otherwise known as “Mistake Forgiveness.” Our character selection will also help us here.
Character Selection
You have two reasonable choices. Bubbles is best at damage (she ends up stinking rich by the end of Level 2), while Finn is best at stress relief.
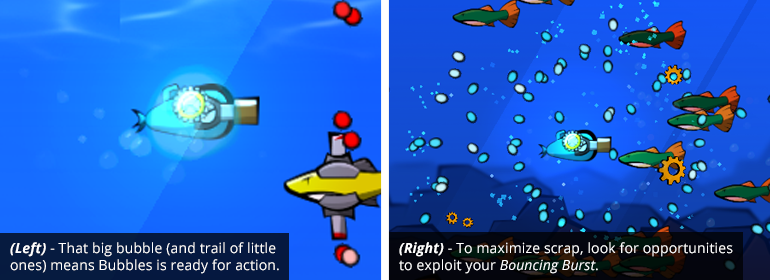
Bubbles
Bubbles’s gun is the Showstopper. This thing does ludicrous damage. If you can hit with all five of the wide-spreading bullets, you’ll inflict 96 damage per second (DPS), double that of her closest competitor (Finn deals 48 DPS). The Showstopper gives Bubbles an excellent chance at reaching 175 scrap by the end of Level 1. This is our target, because it’s the price of the all-important Teleporter, which lets us avoid the toughest boss attacks in Levels 2 and 3.
Bubbles also has a nice stress-relief augment, the Bubble Blocker. This blocks the 75% of the damage from one hit you take every 8 seconds. While the blocker is ready, you can afford to be aggressive. After it pops, hang back and let it recharge.
Beyond this, though, Bubbles struggles against bosses. Her short range means that she has to dodge in and out of combat. If you have the extra scrap, pick up a Repair Nanobots augment to help keep you healed during long fights.
Finn
Finn wins the “ease of use” award. Unlike Bubbles, his cannon and gadget both reach across the full screen. Finn, therefore, has a much easier time dodging and shooting at once.
The real reason to pick Finn, though, is the Re-FINN-ge. This quirkily-named augment has a simple bottom line: it keeps you alive. When you fall below 30% health, the thing activates, keeping you invulnerable for the next 3 seconds. Better yet, during this time, you’ll heal back half your health, putting you nearly back to full. The Re-FINN-ge only triggers once per life, but it makes those lives streeeeeeeeeeeeeeeetch.
Because Finn is so naturally tough and versatile, your shopping list is pretty short. All you need to win is one good escape option.
Upgrades
Our goal is to find parts that reach our goals and cover our weaknesses as cheaply as possible. Here’s a list of the very best.
#1 – Teleporter
This is an easy first pick. We can use it to skip over boss attacks and skip past difficult sections of each level. We can hone in on weak points of bosses, maximize time spent shooting treasure chests, and swiftly scoop up scrap before it drifts away.
It’s tricky to use at first, but so worth it.
#2 – Close Quarters Cannon
Here’s a paradox: a close-ranged cannon that makes boss fights easier. What?
Pre 9/18/2015 – The old version of the CQC shoots bullets with a unique quality: they destroy enemy bullets on contact. The CQC also shoots huge bullets, making wide swaths of the battlefield safe for you and those behind you.
Pre 9/18/2015 – In fact… it makes things a little too safe. On Friday, we’re changing the CQC to use our new Cannon charge-up mechanic. Every 12 seconds, the new CQC can release a circular burst, destroying bullets and shoving away enemies in a zone around you. You can recharge the weapon faster by damaging foes.
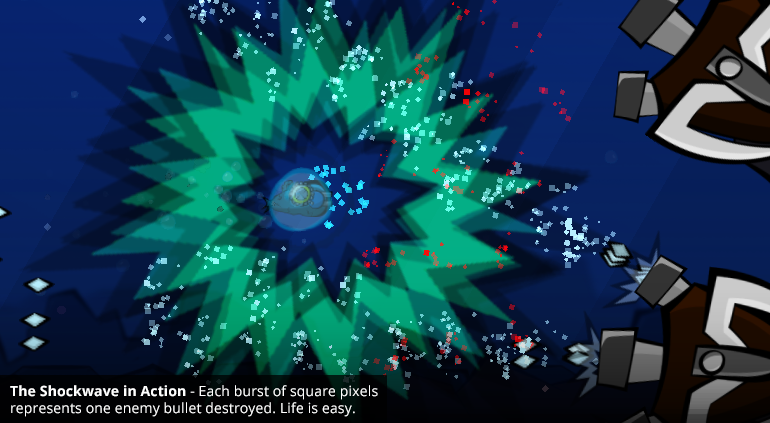
#3 – Shockwave
The new CQC is, in fact, based on the Shockwave gadget, which creates an even larger zone of safety.
The Shockwave costs a ton of energy, however, so grab an energy-replenishing augment if you can.
#4 – Drac-U-Drain
Here’s a good one for Finn. Because he can consistently bulls-eye enemies from afar, he can safely rack up hits that the Drac-U-Drain can convert into healing.
#5 – Repair Nanobots
…And the counterpart for Bubbles. This works to sustain you even if you aren’t dishing out damage, even if it does so at a lower rate.
#6 – Seaweed Wrap
Alright, here’s the wild card. It’s expensive, but this thing is good at pretty much everything.
As you hit enemies, you’ll coat them with sticky seaweed. As you stack up the debuff, enemies will move and attack slower and slower, to a maximum reduction of 50%, lasting 6 seconds (2 seconds on bosses). As a result, thoroughly-coated enemies move and attack as though they were in hard difficulty, instead of extreme.
The investment is a steep 250 scrap, but if you can afford it, you’ll be glad you did.
#7 – Health Tank
Old reliable. This guy adds 40% to your maximum HP (and the healing you receive from scrap) for the low price of 100 scrap. Pick it up if nothing else stands out.
(Non-Boss) Gameplay Tips
Levels are far easier than bosses. During levels, our goals are as follows, in this order:
- Survive. Save your three precious Continues for the boss fights.
- Get Rich. Earn as much scrap as possible.
Never take risks to earn extra scrap. However, when you can safely shoot at enemies, aim for fragile enemies who drop a lot of scrap. Above all, target Guppy Gunners. These guys aren’t really a threat (until they reach you), and they drop a disproportionate reward.
Boss Tips
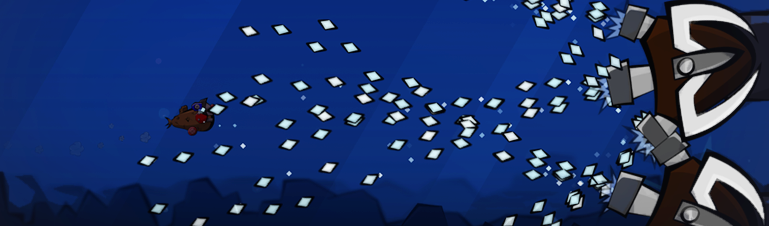
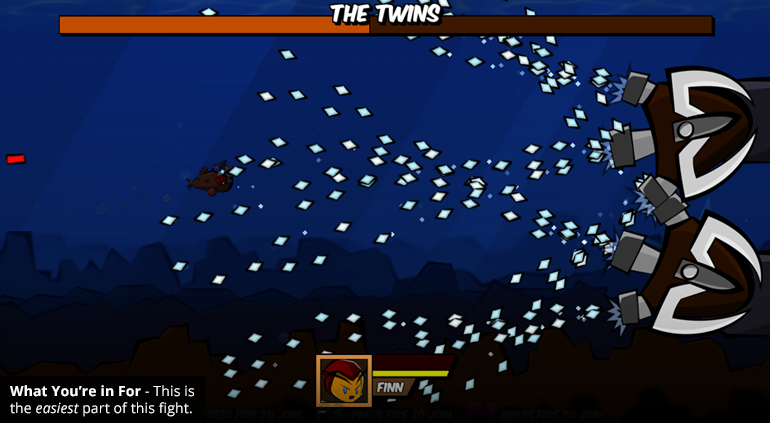
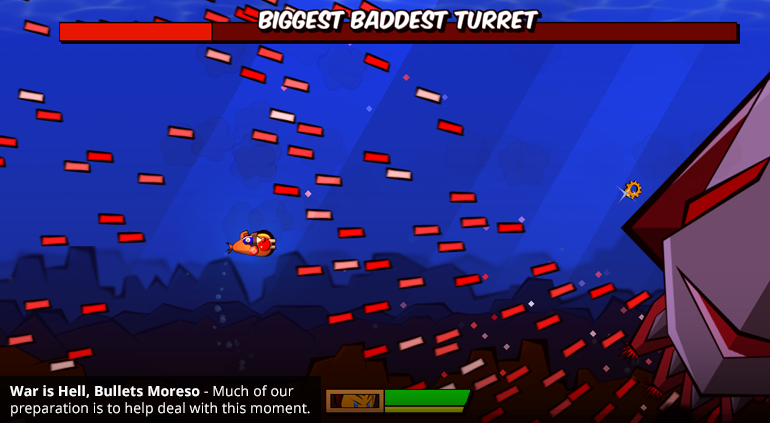
The Twins (Miniboss)
Oh, the pain.
This is Bubbles’s biggest challenge. During the first phase of the fight, these turrets flood the screen with an unending torrent of red. You’ll need to master a pattern of sneaking in, landing a few hits, then backing off and slipping through the bullet trails.
Each Twin enters its second phase at 80% health. Things get just a bit easier now, as the turret will occasionally spin. It fires a cyclone of fast-moving shots, but while it’s facing away, you have a crucial window of safety to land a few more hits.
At 55% health, each twin enters a third phase, where it will frequently pause, charge up, then unleash a blizzard of freezing fire. This is the sweet spot for Bubbles. While blizzarding, the turret is locked in place. Bubbles can find a little zone of safety and fire away.
Therefore, since the turrets become safer as they lose health, your goal should be to focus fire on a single turret, reducing overall threat as fast as possible. Once one turret is blizzarding, you can focus on either killing that turret or knocking the other below 55%.
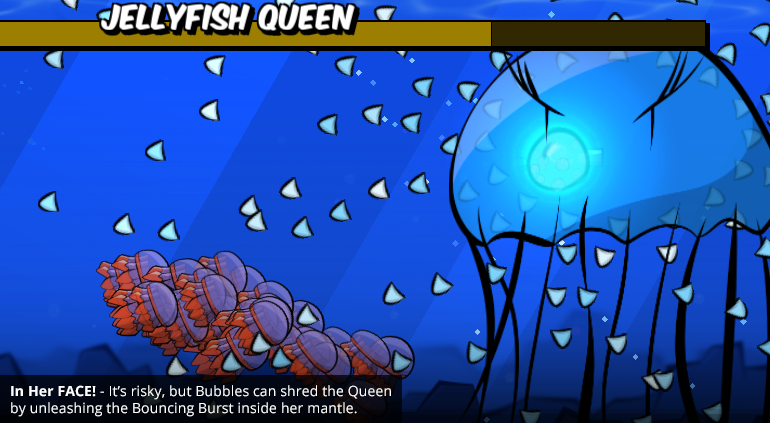
Jellyfish Queen (Miniboss)
Once you get the pattern, this is easy pickings.
The Queen’s bullets are easy enough to dodge: just stay well away. The trick is to avoid her minions while doing so. However, there is an easier way. The Queen is capped at 30 minions, after which she won’t spawn any more. If you can get her to spawn 30, then move around until they’re clustered in a little ball, the fight will go a lot smoother.
Developer’s Note – This isn’t good gameplay, since the fight becomes quite easy after you finish the 20-second chore of rounding up her minions. Expect this to be one of the first parts of this guide to become obsolete.
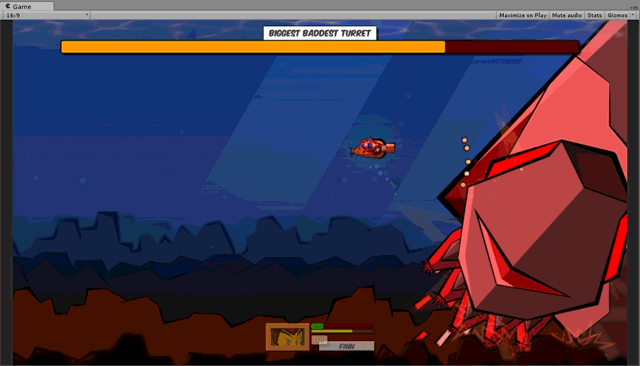
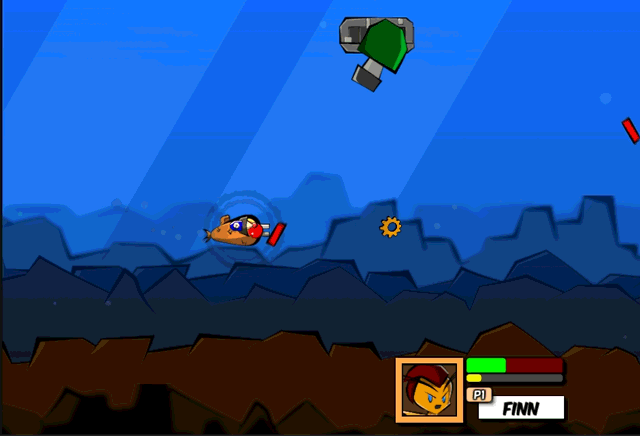
Biggest Baddest Turret
This is what we prep for. With the right tools, this is a thrilling, sometimes blissful – even meditative – fight. Without the tools, though, it’s the most stressful thing Fingeance has to offer.
The Biggest Baddest Turret has two red, glowing weak points. Attacking them deals quadruple damage, so aim there when you can. As for defense, BBT has five attacks, telegraphed by the following statements:
Target Acquired – A steady outpouring of bullets. Dodge dodge dodge, and wait for it to pass.
Sweep Defense System Enabled – The BBT swivels up or down, then sweeps towards the players, shooting a dense thicket of bullets. This right here is why we need an escape option. Save it for this attack. Otherwise, you’re toast.
Diverting Power to Rear Cannons – The BBT flips, shooting fast-moving rockets out of its rear cannons. Look closely: the BBT tracks your movement very very slowly during this attack. Exploit that by hugging the top or bottom right side of the screen. You’ll be completely safe.
Requesting Ordinance Support – The BBT doesn’t do anything here. Instead, 30 missiles zoom in from the right side of the screen. The answer? More dodging. If you have it, the Laser Deploy does an admirable job of destroying the missiles as they appear.
Sweep Defense System Enabled – Thought we did this one? Below 32.5% health, the BBT will sometimes execute a swift double-sweep, swiping first one way, then the other. On Extreme difficulty, this is almost a guaranteed death the first time you see it. Be prepared, and keep shooting weak points. The fight is almost over.
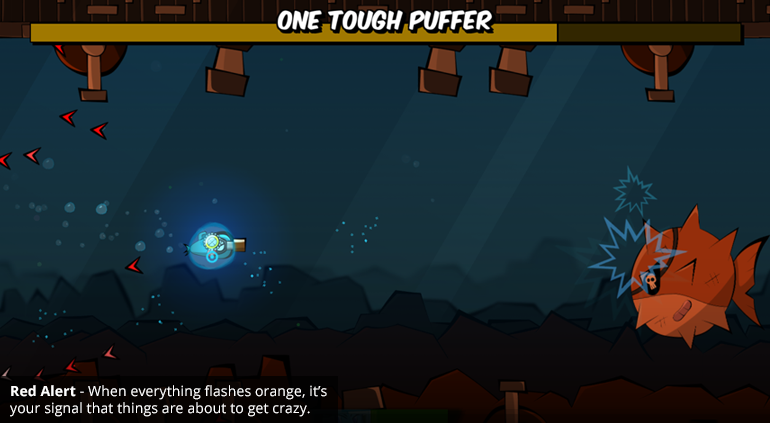
One Tough Puffer
Strategy and patience are the keys to victory.
Dodging the Puffer’s attacks isn’t too tricky. Things only get tough once the boss drops below 75% health. At this point, the Puffer will summon a giant batch of turrets to shoot at you, and it will do so once every 24 seconds. To survive, you’ll need to save your escape options (and other boosts to your firepower, including gadgets) until the turrets arrive. In the first few seconds post-turrets, unleash everything you have. On Extreme difficulty, the turrets will tear you apart if you can’t kill them fast.
Thanks for Playing!
And just like that, you’re done.
I hope you enjoyed a look inside Fingeance strategy! These are just a few of the things we have in mind when designing parts and bosses… and that’s just single player! Someday we’ll take a look inside constructing a team to tackle the ocean’s darkest depths. Until that day, good luck tackling the Extreme!
-