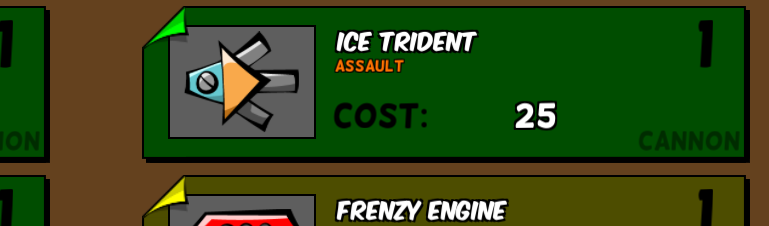
As I stated in an earlier post, the shop menu has been a huge problem for players. It was too complicated. Figuring out the function and relative power of each part was a nightmare. Since then… we’ve made a lot of progress.

Animating the Shop Menu

Main-and-Shop-Animations

One of the problems of the old shop was that there really wasn’t a great way to animate it because of the way that I made it. To rectify that issue I moved the new shop over to our updated menu system that the other menus use. This system allows us to make really cool animations between menus. Recently on Twitter, I tweeted a preview of the new menus animations; here are all of the new animations in action.

More-Info-and-Purchase-Animations

The more I do animations, the more and more I enjoy it. But these animations aren’t the only things that are new in this version of the shop. There are now some handy things that make it easier for you to tell what each part does. We also (finally) included a purchase confirmation box, which should prevent the bulk of the user error we were seeing in the shop.

There are still some things that need to be added, like changing the color of the cost on the small buttons.

Providing More Info

To improve readability in the shop, we added two functions: “More Info” and  “Preview”.

More Info Example

More Info is similar to how the old shop was, where it shows you a description of what exactly that part does. Crucially, this information now only appears when you hit the “More Info” button. Before, this information was always present, leading to mind-boggling information overload (even for Fingeance veterans).

Preview-Parts

Preview, meanwhile, is an even bigger improvement. Players can now test out a part or try out their current loadout before they buy something. Even with our More Info panel, there’s only so much info that can be presented in text. Details like firing arc, firing rate, bullet range, and bullet speed are better shown than told.

We are still working a few more functions into the shop, but we hope to be done with it very soon.

Bigger Buffs

Besides the new shop, we also have been working on getting everything to work well. That includes adding in some new buffs. One of those buffs is to literally make you buff; it makes you a bigger sized ship. You may be wondering “Why on earth would I want to be bigger?” This kind of buff is for those that want to protect their team, helping players fill out their roles.

Last week has been somewhat difficult productivity wise. We’ve all been preoccupied with other projects, and so creation has somewhat been slow. That doesn’t mean we’re empty handed though!

New Shields

Lane introduced you to augments last time. The bulk of our work has been in making augments, but we’ve also introduced a new mechanism that ships can use.

Ship-Shield

Shields protect a player (or miniboss/boss, possibly) from damage for a duration. They also have a set amount of damage, shown on your health bar, that they can take. Once its damage limit has been reached, the shield breaks and your ship takes regular damage again. Think of a shield from a game like League of Legends; that’s pretty much how shields work here.

Augments and Other Parts

With this addition, we’ve added a few tentative parts as experiments. These may not be in the final game, but they’re definitely proofs of concept.

Panic Button – Augment
• -25 health
• Large, long lasting shield is deployed when the player reaches 20% of their total health.
• Useful for beginner players, or those player who like to take large risks.

Energy Chalice – Augment
• Energy regeneration is increased based on the amount of energy your ship is missing.
• Regeneration scales based on the amount of missing health, not a percentage (missing 200 energy will increase regen twice as much as missing 100 energy).

Shell Shot – Cannon
• Provides the player with a shield when the player stops shooting after a period of time.
• Lower rate of fire and range, but damaging bullets

Bloodlust – Augment
Ship is healed a very small amount each time the player hits a target.

As you can see, adding in the ability to make an augment or add a shield to players gives us more design space to work with. Shields in particular are very useful effects for tanks. Keep in mind, a player can add as many augments as his/her ship has room for, so feel free to experiment!

The Shock Shield.

This thrumming bulwark of porpoise-punishing power might be the marquee item for Fingeance, and we’ve all but ignored it on this site. Stephen wrote a primer on it here, but it deserves a second look.

You see, the Shock Shield isn’t the only defensive item in Fingeance. Once done, the game will be packed with them. But right now, the Shock Shield is king. Check out this stopping power:

Shock Shield img1b

Let’s take two lessons from that image.

First, top-difficulty Fingeance can be insane. Just look at that bullet output. For anyone steeped in shoot-em-up culture, keep in mind that the player submarine’s hitbox is the entire submarine. That means dodging attacks like this is just as hard as it looks.

Second, players can overcome this difficulty by working together. A team carrying a Shock Shield plays much differently than a team without, since the shield provides brief moments of near-total protection. So, with all that power, when would you ever not play with a Shock Shield? To find our answer, let’s look at a few facts about Fingeance enemies:

  • Many enemies change behaviors as they survive, increasing their threat over time.
  • Several enemies enjoy summoning minions, increasing their threat over time.
  • Most bosses have some sort of Soft Enrage mechanic, increasing their threat over time.

See the subtle commonality? High-difficulty Fingeance is about threat assessment and management. When you can put down the threat fast, you’ll save your team a lot of pain down the road. The tradeoff is damage vs. safety. The Shock Shield provides a lot of safety, but no damage. When you bash a foe with the Shock Shield, you shock them (stunning them briefly), but put them no closer to their demise.

Further – and here’s where we get to the delicate balancing act of Fingeance part design – many offensive items can be used in defensive ways. The Shock Shield is merely the easiest to use.

Introducing the Bouncing Burst:

Shock Shield img3

This thing is capable of massive area-of-effect mayhem. The catch? You have get up close to do it.

With this part, we’re asking for a player to put it all on the line. Sure, it can be worth it (when our demo hits, try sneaking inside the Jellyfish Queen’s body, then unleashing this baby. Ouch.), but when you’re that close to a boss, things can turn sour fast. Worse, the Bouncing Burst doesn’t seem to offer any protection. Sure, your team needs the damage, but which part do you choose?

Decision-making in Fingeance relies on the needs of your team, and also on their skill. Remember how I said the Shock Shield was only the easiest defensive item? Basically defensive training wheels? Well, check this out:

Shock Shield img2

[Editor’s Note] – This shot was taken by playing one-handed for the purpose of screenshotting. The Bouncing Burst can create a pause in the bullet stream large enough to allow passage without quite as much difficulty as this image would suggest.

There’s that same boss, executing the same attack as above. Now, the burst’s brief stun effect allows the player to (just barely) sneak through without taking damage. As players climb through the higher difficulties, we expect a certain degree of scrappiness. To battle the enemy superpowers – devastating attacks and growing threat – you’ll need to maximize every part, offensively and defensively.

As we careen toward our June 1st demo, we’ll be adding polish and balance to these parts and others. We can’t wait to see how you’ll put them to use.